Category Archives: How To

Your Complete Guide To Skullcrushers!

by Bill Geiger
BodyBuilding.com

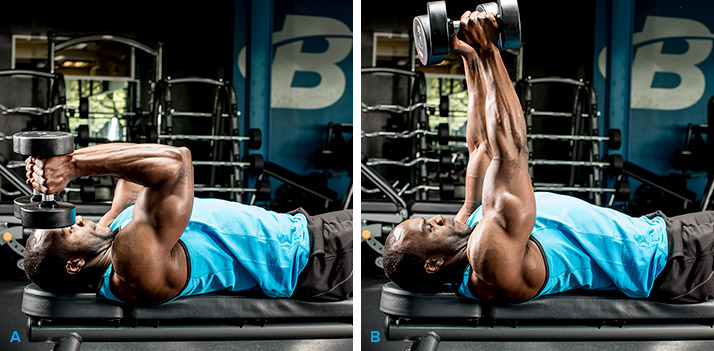
your-complete-guide-to-skullcrushers-graphics-neutral-grip-dumbbell-skullcrusher

Contrary to what the name might suggest, skullcrushers won’t send you screaming to the ER—at least when done right. They can, however, help you build massive triceps. Here’s everything you need to know about this popular exercise!

Most exercises have rather literal names: A single-arm overhead dumbbell extension describes the movement pretty well, after all. A few others, however, are named for the part of the body they’ll break if you lose control. In this class we have skullcrushers.

Skullcrushers are actually a family of single-joint triceps exercises, not necessarily just one exercise, because there are so many ways to do them. You can use almost any kind of implement—dumbbells, barbell, EZ-bar, or cables—as well as a variety of angled benches. Each variation provides a slightly different feel and effect, so I’ll guide you through the most popular.

What all skullcrusher variations have in common is simple: elbow extension. The upper arms are generally locked in a position perpendicular to the body, which means both the long and lateral triceps heads—the two biggest—are called into play. As you increase the angle of the bench (i.e., use a more inclined bench), the upper arms move closer to an overhead position, so more of the work falls on your triceps long head. Doing the movement on a decline bench reduces the long-head involvement, so more of the emphasis falls on the lateral triceps head.

CLICK HERE FOR SIX TIPS FOR CRUSHING THE SKULLCRUSHER

Learn more about at-home personal training

Spice up your plank with this exercise

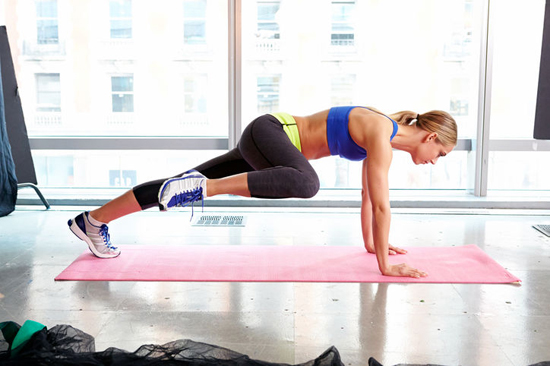
Spider Plank with Burlington Boot Camp

Spider Planks!

1. Start in the plank position on the floor with your arms bent at a comfortable.
2. Raise one foot off of the ground, rotating the leg and bringing the knee towards your elbow – aim to reach your elbow.
3. Return your leg to the starting plank position and repeat on the opposite side.

Benefits:

  • Strong sore
  • Toned abdominal muscles, focusing on the obliques

Our HomeBodyFit and Burlington Body Camp clients can expect effective and challenging circuits as a part of our regular sessions.

Learn more about our services and FREE CONSULTATION!

What is Functional Fitness?

How to do Wood Chops Functional exercise

How to do Wood Chops Functional Exercise

At HomeBodyFit, we love functional fitness, otherwise known as training your body to handle real-life activities in real-life positions. For example, our training programs are not confined to lifting weight in an idealized posture conceived by a gym machineConventional weight-training (which is great and should be a part of of your fitness routine) isolates muscle groups, but functional fitness routines take your regime one step further and teaches the muscle groups you’re isolating to work with others,

One example, The Wood Chop!

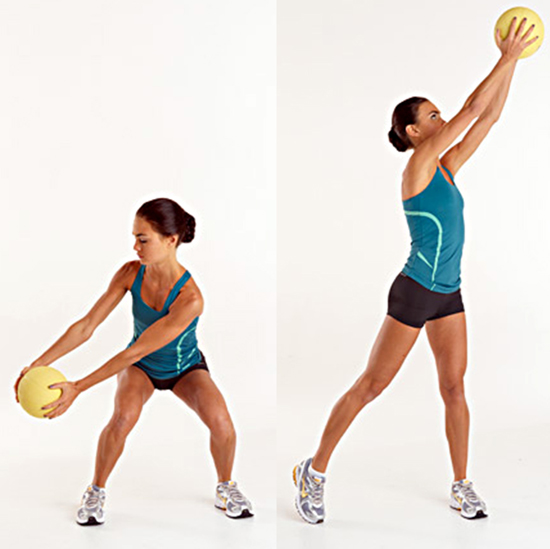
How to do The Wood Chop

All you need is a medicine ball (we have 8 to 20-pounders available for our clients).

  1. Holding the ball with both hands, squat down with the ball over one knee.
  2.  With control, explosively swing the ball over your opposite shoulder.

Important! Concentrate on decelerating the ball with your core.

Benefits:

  • Slimmed waistline
  • Strong core
  • Defined shoulders

The HomeBodyFit Wood Chop Circuit (Advanced)

Do 10 reps of The Wood Chop on each side and repeat four times

Ready to take your exercise and/or program to the next level? Learn more about HomeBodyFit at-home fitness programs and meal plans.

Remember chin-ups from gym class? Work your back and biceps at-home with a chin-up bar!

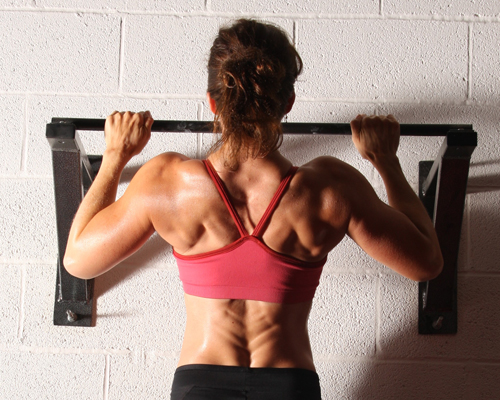
How to do Chin-ups (Pull-ups)

Work your back and biceps at home with a chin-up bar!

Chin-ups (or Pull-ups) are an excellent body weight exercise you can do at home with a chin-up bar…or head to your local park and use the monkey bars.  Combine them with push-ups and you have a balanced, major-muscle groups circuit and a solid cardiovascular workout.

How to do Chin-ups and Pull-ups

Chin-ups

  • Face the bar and grab it with your palms facing you, keeping your arms shoulder width apart
  • Pull yourself up…and the trick is to do it slowly (when you jerk yourself up, you don’t get the full benefit of the chin-up)
  • Keep your body steady and don’t sway

Pull-ups

  • Face the bar and grab it with your palms facing away from you, with your arms beyond shoulder width apart
  • Pull yourself up…until your chest touches the bar, concentrating on your lats (the muscles below your armpits)

Note: This method is the more difficult of the two, so take your time and build up to this one.

Interested in starting an at-home fitness program? Learn more about HomeBodyFit here!


Spending long hours hunched over your desk? This exercise can help!

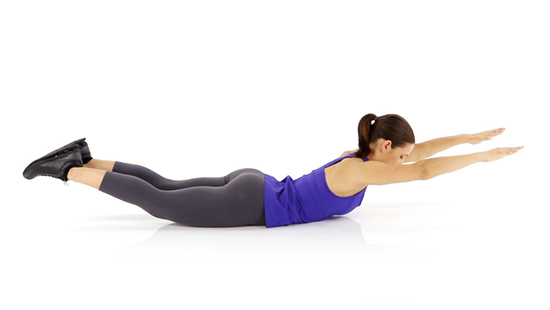
Superman Exercise

How to do a Superman stretch

Supermans are a fantastic stretch exercise and one our clients look forward to, as they provide a nice “active rest” exercise during circuits. Supermans strengthen your posterior chain, which includes:

  • lower back
  • glutes
  • hamstrings

How to do Supermans:

  1. Lay on your stomach, reaching your arms forward (like you’re Superman/flying).
  2. While looking forward and keeping your head straight, simultaneously (and gently) raise your legs and upper body off the floor.
  3. Hold for three seconds and repeat.

At HomeBodyFit, we use this move to help all our clients strengthening the posterior chain, which is particularly beneficial to clients who spend long hours working at a desk.

Learn more about our at-home and online fitness programs.

HomeBodyFit Free Gift on $75 orders with BodyBuilding.com

Send your core strength through the roof!

At HomeBodyFit, our clients are used to seeing planks and plank circuits incorporated into their workouts. Why? Because they work! They may be difficult to start with, but once you feel and see the benefits, you’ll begin to crave the burn that comes with doing challenging plank circuits.

The physical and aesthetic benefits of planking are:

  • Improves strength and flexibility throughout the body
  • Requires focus and mental stamina
  • Improves posture, tightens your core and streamlines that waistline!

Here’s how to properly do a Full and Side Plank.

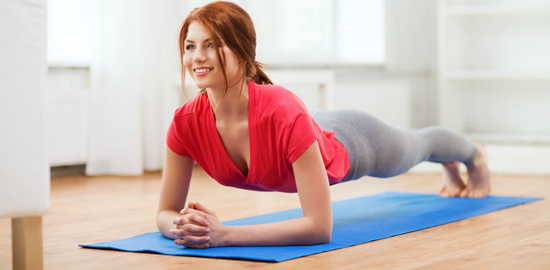
How to do a Full Plank

How to do a full plank

How to do a full plank

  • On a yoga matt, start in a push-up position and lower your forearms to the floor; your elbows and fists are flat to the ground (your hands are either straight out in front of you – palms down or in a fist, or clasped, whichever is more comfortable for you).
  • With your toes curled under, keep your back straight, your buttocks down.
  • Engage your abs (imagine pulling your belly button towards your spine)
  • You’ll feel a burning. Continue to keep your buttocks down.

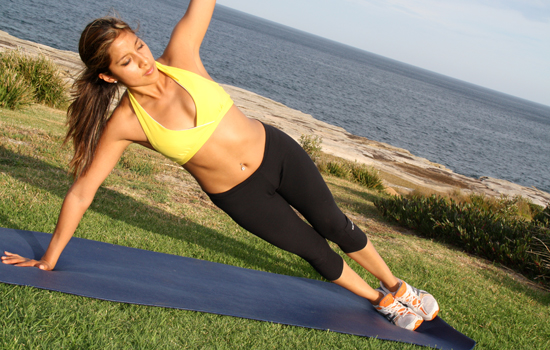
How to do a Side Plank

How to do a side plank

How to do a side plank

  • Lie with the whole side (starting on the left or right) of your body on your yoga matt.
  • Use your floor-side elbow to prop up your body, keeping your body up on your elbow – aligning your elbow directly underneath your shoulder – and your feet together.
  • Your forearm (lying perpendicular to your body), elbow and floor-side foot should be supporting your body.
  • Rest your opposite arm along your body or extent it straight up to the ceiling.
  • Engage your abs (feel the burn) and hold the pose.

Note: If this is too challenging at first, you can bring your knees down to the floor to help support your weight. To make this exercise more challenging, balance on on just your floor-side hand and foot (pictured above).

Interested in learning more about the HomeBodyFit Plank Circuit (Advanced)? Contact us for a FREE consultation today!

Free Optimum Optimen with the purchase of Muscle Building Whey Protein Powder*

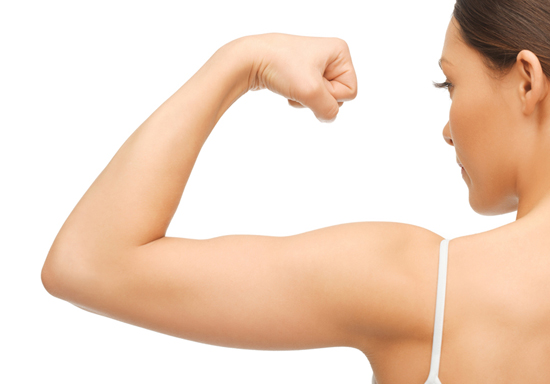
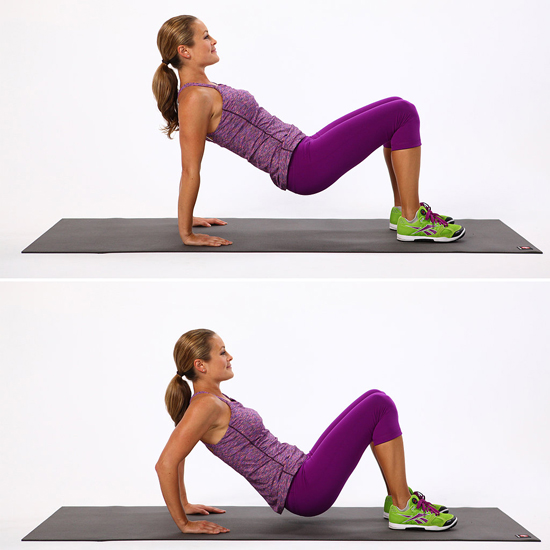
Want to tone your triceps? No equipment required

These dips are an excellent exercise for the tricep and will get you tank-top ready in no time.

How to get toned triceps - no equipment required

How to get toned triceps – no equipment required

How to do a tricep dip:

    1. On a secured bench, stable chair or even on the ground, position your hands shoulder-width apart.
    2. Extend your legs out in front of you (or bend your knees if this is too challenging) and slide your butt off the front of the bench.
    3. Straighten your arms while keeping a slight bend in your elbows (you want to focus the tension on your triceps).
    4. Now that you’re in position, slowly bend your elbows to a 90-degree angle, lowering your body toward the floor – keeping your back close to the bench. This is the bottom of the movement.
    5. Immediately press down into the bench, straightening your elbows – returning to the top of the movement. This is one rep.Note: Concentrate on keeping your shoulders down as you do each rep.
Triceps-Dip

Triceps-Dip

Tabata Tricep Dips Circuit (Advanced)

Do as many dips as you can for 20 seconds and rest for 10 seconds. Repeat eight times. To make this exercise more challenging, start with your legs extended straight out in front of you (switching to bent knees if you need to).

At HomeBodyFit, we’re big fans of tricep dips. Why? Because they help develop powerful and defined triceps…and you can do them anywhere…at home on the floor or on the bottom of the stairs…or even on a pack bench!

Want a full body Tabata workout that will sculpt and tone from head to toe? Learn more about our at-home and online fitness and meal plan services here!

HomeBodyFit Free Gift on $75 orders with BodyBuilding.com

Want fast results? Add this exercise to your routine.

Make jump squats a part of your exercise sessions. Why? You’ll get results…fast! As well, they benefit your entire body (including your posterior chain and core) and they are an excellent boost to your overall fitness.

Get results fast!

Get results fast!

How to do jump squats

Step one: With your knees shoulder width apart, bend your knees slightly, keeping your back straight. Squat down.

Step two: Immediately jump upwards off the ground. As your feet leave the floor reach upward, straight out in front, or with your hands on your hips, keeping your back straight and facing forward.

Step three: Land back in the position you started in. Bend your knees slightly and immediately repeat the second step.

Tabata Jump Squat Circuit (Advanced)

Do as many jump squats as you can for 20 seconds and rest for 10 seconds. Repeat eight times. To make this exercise more challenging, hold a pair of dumbbells.

At HomeBodyFit, we’re fans of incorporating jump squats into nearly every personal and couples training session. They are excellent for conditioning as well as being an effective cardiovascular exercise. Learn more about our services here!

7 fantastic abdominal exercises for a chiseled six-pack

by Chady Dunmore

Although it’s certainly true that you can’t have a chiseled six-pack unless your diet is top notch, training your abs definitely has an effect on their shape. Let’s say you’re killing your diet and you’re starting to feel lean and mean, but without some muscle mass on your rectus abdominus, you won’t have much to show off when that belly fat comes off!

Here are seven fantastic abdominal exercises that will help you build and shape a sexy stomach.

(If you’re a HomeBodyFit client or Burlington Body Camp attendee, these will all look familiar!)

HomeBodyFit Abs

Seven fantastic abdominal exercises that will help you build and shape a sexy stomach

Learn more about HomeBodyFit and Burlington Body Camp

HomeBodyFit Free Gift on $75 orders with BodyBuilding.com

Try this “cheeky” training program to build perfect glutes!

HomeBodyFit Free Gift on $75 orders with BodyBuilding.com

Let’s get one thing clear: It’s all about the bum. Sure, built biceps fill out a shirt and six-pack abs are the prize of every beachgoer, but the back is where it’s at. A bodacious booty is essential to a good physique and not just for stage-bound fitness contestants. Everyone seems to want a great bum. Photos of posteriors flood the Internet and are often the most viewed and “liked” body part on social media. There’s just something magical about a beautiful butt!”How do you get your butt like that?” is the fitness question I hear the most. And before you say it, yes, genetics play a part. Just like a pretty smile or clear skin, there are people born with a genetic booty advantage, but that doesn’t mean it’s impossible to improve your glutes. Women often turn to cardio to “get a butt,” but the clear path to a better booty doesn’t go through the treadmill or the elliptical. Instead, start with weights.