Tag Archives: core

Spice up your plank with this exercise

Spider Plank with Burlington Boot Camp

Spider Planks!

1. Start in the plank position on the floor with your arms bent at a comfortable.
2. Raise one foot off of the ground, rotating the leg and bringing the knee towards your elbow – aim to reach your elbow.
3. Return your leg to the starting plank position and repeat on the opposite side.

Benefits:

  • Strong sore
  • Toned abdominal muscles, focusing on the obliques

Our HomeBodyFit and Burlington Body Camp clients can expect effective and challenging circuits as a part of our regular sessions.

Learn more about our services and FREE CONSULTATION!

Burn an extra 300+ calories a day in just 4 minutes

How to do Mountain Climbers

How to do Mountain Climbers

Mountain Climbers are an incredibly challenging exercise, but they are worth it! They scorch calories, boost your metabolism, pump up your heart rate and strengthen legs and core muscles. And the best part is…you can do them anywhere!

Even if you only do one HomeBodyFit circuit, (below) you’ll boost your calorie burn for the day – 300+ calories worth!

How to do Mountain Climbers

  1. Come to a push-up position with your knees off the floor and your hands shoulder-width apart. Your hands should be positioned slightly ahead of of your shoulders and your fingers pointed forward.
  2. Bring one foot forward like a lunge and place it on the floor under your chest with your thigh towards your chest. Keep your other leg straight and strong and your toes are tucked under with your heel up. Engage your abdominal muscles to stabilize your spine and pull your shoulder blades down and back.
  3. With your hands firmly on the ground, abdominal muscles engaged and shoulders strong, jump to switch leg positions. Both feet leave the ground as legs switch positions. Repeat at maximum intensity for best results.

HomeBodyFit Tabata Mountain Climbers – Advanced

Work this circuit into your next session. All you need is a stopwatch. Remember, for best results you need to perform these at maximum intensity. 

Perform mountain climbers (engaging your abdominal muscles and keeping your shoulders strong) for 20 seconds. Rest or 10 seconds. Repeat 8 times.

Interested in starting an at-home fitness program and meal plan? Contact HomeBodyFit for a FREE Consultation.


Send your core strength through the roof!

At HomeBodyFit, our clients are used to seeing planks and plank circuits incorporated into their workouts. Why? Because they work! They may be difficult to start with, but once you feel and see the benefits, you’ll begin to crave the burn that comes with doing challenging plank circuits.

The physical and aesthetic benefits of planking are:

  • Improves strength and flexibility throughout the body
  • Requires focus and mental stamina
  • Improves posture, tightens your core and streamlines that waistline!

Here’s how to properly do a Full and Side Plank.

How to do a Full Plank

How to do a full plank

How to do a full plank

  • On a yoga matt, start in a push-up position and lower your forearms to the floor; your elbows and fists are flat to the ground (your hands are either straight out in front of you – palms down or in a fist, or clasped, whichever is more comfortable for you).
  • With your toes curled under, keep your back straight, your buttocks down.
  • Engage your abs (imagine pulling your belly button towards your spine)
  • You’ll feel a burning. Continue to keep your buttocks down.

How to do a Side Plank

How to do a side plank

How to do a side plank

  • Lie with the whole side (starting on the left or right) of your body on your yoga matt.
  • Use your floor-side elbow to prop up your body, keeping your body up on your elbow – aligning your elbow directly underneath your shoulder – and your feet together.
  • Your forearm (lying perpendicular to your body), elbow and floor-side foot should be supporting your body.
  • Rest your opposite arm along your body or extent it straight up to the ceiling.
  • Engage your abs (feel the burn) and hold the pose.

Note: If this is too challenging at first, you can bring your knees down to the floor to help support your weight. To make this exercise more challenging, balance on on just your floor-side hand and foot (pictured above).

Interested in learning more about the HomeBodyFit Plank Circuit (Advanced)? Contact us for a FREE consultation today!

Free Optimum Optimen with the purchase of Muscle Building Whey Protein Powder*

If she can do it, so can I!

Did you know that just hearing that others “can do it” can greatly influence your fitness performance?  According to the journal of Psychology of Sport and Exercise, motivation from others can have a very powerful effect on one’s exercise duration and intensity.

Fitness plank and motivation

If she can do it, so can I!

The study went like this:

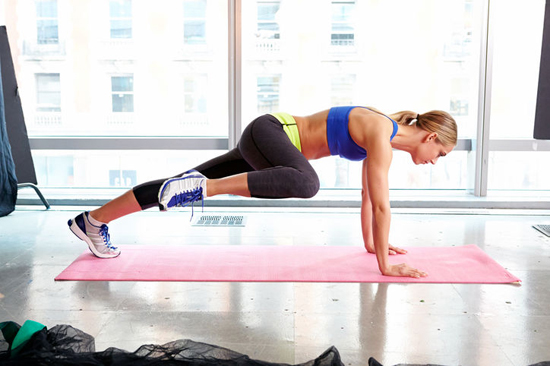
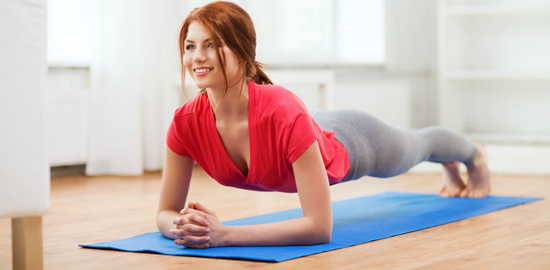
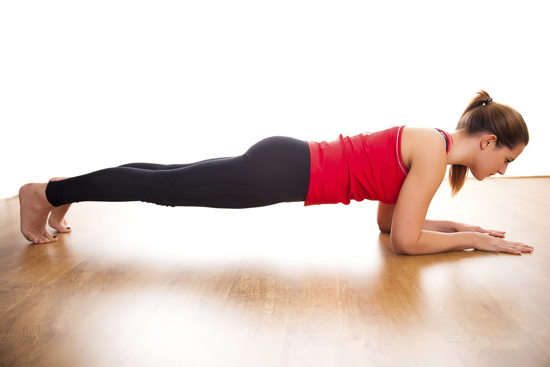
A group of 68 participants were split into two groups and asked to hold a plank for as long as possible. After finishing, the first group was told that a similar group had held their planks for 20 percent longer. The second group was given no feedback.

Following this, the two groups were asked to perform a second plank, again for as long as possible. The researchers found that the first group (who had received the feedback) rated their confidence at 45 percent before the first plank and nearly 60 percent before the second plank, holding their planks for 5 percent longer; whereas the second group’s hold time dropped 18 percent.

Essentially, the study found that if you learn or observe that your peers are doing well, you’re more likely to believe you can too.

So seek out influential stories, talk to friends and family about their fitness efforts and workout in pairs and groups. These can all help boost your confidence and enhance your performance…and don’t forget to let others know about your accomplishments!

Learn more about our couples and group fitness programs including Burlington Body Camp (drop-in tonight for only $15)

HomeBodyFit Free Gift on $75 orders with BodyBuilding.com


Want to tone your triceps? No equipment required

These dips are an excellent exercise for the tricep and will get you tank-top ready in no time.

How to get toned triceps - no equipment required

How to get toned triceps – no equipment required

How to do a tricep dip:

    1. On a secured bench, stable chair or even on the ground, position your hands shoulder-width apart.
    2. Extend your legs out in front of you (or bend your knees if this is too challenging) and slide your butt off the front of the bench.
    3. Straighten your arms while keeping a slight bend in your elbows (you want to focus the tension on your triceps).
    4. Now that you’re in position, slowly bend your elbows to a 90-degree angle, lowering your body toward the floor – keeping your back close to the bench. This is the bottom of the movement.
    5. Immediately press down into the bench, straightening your elbows – returning to the top of the movement. This is one rep.Note: Concentrate on keeping your shoulders down as you do each rep.
Triceps-Dip

Triceps-Dip

Tabata Tricep Dips Circuit (Advanced)

Do as many dips as you can for 20 seconds and rest for 10 seconds. Repeat eight times. To make this exercise more challenging, start with your legs extended straight out in front of you (switching to bent knees if you need to).

At HomeBodyFit, we’re big fans of tricep dips. Why? Because they help develop powerful and defined triceps…and you can do them anywhere…at home on the floor or on the bottom of the stairs…or even on a pack bench!

Want a full body Tabata workout that will sculpt and tone from head to toe? Learn more about our at-home and online fitness and meal plan services here!

HomeBodyFit Free Gift on $75 orders with BodyBuilding.com

Want fast results? Add this exercise to your routine.

Make jump squats a part of your exercise sessions. Why? You’ll get results…fast! As well, they benefit your entire body (including your posterior chain and core) and they are an excellent boost to your overall fitness.

Get results fast!

Get results fast!

How to do jump squats

Step one: With your knees shoulder width apart, bend your knees slightly, keeping your back straight. Squat down.

Step two: Immediately jump upwards off the ground. As your feet leave the floor reach upward, straight out in front, or with your hands on your hips, keeping your back straight and facing forward.

Step three: Land back in the position you started in. Bend your knees slightly and immediately repeat the second step.

Tabata Jump Squat Circuit (Advanced)

Do as many jump squats as you can for 20 seconds and rest for 10 seconds. Repeat eight times. To make this exercise more challenging, hold a pair of dumbbells.

At HomeBodyFit, we’re fans of incorporating jump squats into nearly every personal and couples training session. They are excellent for conditioning as well as being an effective cardiovascular exercise. Learn more about our services here!